WordPress Themes, Plugins, Tutorials, Tips And More...

Tag: Issue

Understanding And Fixing WordPress Logging Out Issue

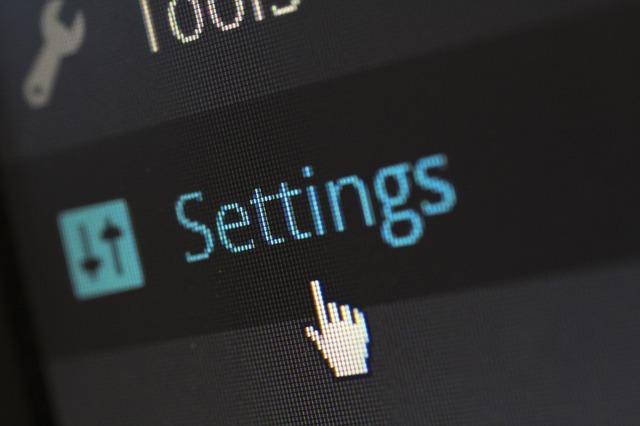
WordPress Settings

There are large chunk of frustrating problems which comes in between when one play with WordPress. While among this large problems list, one is WordPress keeps logging you out. Although it is strange in itself as if you just think of a situation where this content management system play such a havoc role in keeping you out from your own website (your own system).

People often perform number of activities the time when they fall in this issue trap and ends up in either deactivating all the plugins, clearing browser cookies, emptying cache and more. While none among the above list will actual work out but with our tutorial we are sharing a solution for you. In this tutorial article, we will be showing you up on how one can fix the issue.

Understand First

So what actually taking you out all the time, making both your time and work efficiency a hard go? Well, the answer for this lies in itself, WordPress basically set a cookie in your browser which will be required to authenticate a login session. This cookie is meant for the WordPress URL which being stored in your CMS’s settings section.

Say, if you are accessing from a URL that does not make a match to the URL which is in your WordPress settings section, then WordPress will not be able to authenticate your session, resulting in logging you out from the system. This means, the cause of the issue is when the WordPress URL and the Site Address don’t match i.e. constitute two different URLs, then  getting this issue in front of you is common.

How To Solve It?

#1 Method 1 – By Logging Into WordPress Dashboard

To make it solved, login to your WordPress dashboard and go to Settings » General. Once you are in your Settings section, all you have to check is that there will be the same URL both in your WordPress Address as well as Site Address area.

#2 Method 2 – Make It Fix Through FTP

If in case, the WordPress dashboard doesn’t allow you to login to the panel, then the second option in hand is to make it fix through FTP. Sign in to your website using FTP client, following by locating the wp-config.php file in your site’s root directory.

Here, download the file to your desktop and open it up with the help of a text editor. Simply add the lines of code below and you are done.

While if in case you want to use non-www in the URL, then, use the following lines of code.

How To Fix Image Upload Issue In Your WordPress Blog

WordPress

Quite a times when either we or you experienced an image upload issue. It means as soon as we upload an image in WordPress, it will show up as broken in the media library or sometimes even more worst, we will not be able to upload any image in WordPress. To help you on this, in this article, we will show you up on how to fix image upload issue in your WordPress blog.

#1 Understanding Problem – What Causing It?

The issue caused mainly because of the wrong file permissions. It means that the file permissions you set in your WordPress blog is meant to be wrong. In short, you need to correct those file permissions so that you will be able to upload images to your website.

#2 Why This Happened?

This can be happened because of one-to-many reasons, say your hosting company upgrade something from the backend and result of which, the file permissions got changed. Similar way, on shared hosting which is quite a poorly configured also results in ending up wrong file permissions result of which you would not be able to upload the images.

#3 How To Solve It?

In order to solve it, you would be requiring a FTP client, like Filezilla. Once you connect your website using the FTP client, then you need to go your website’s wp-content directory where you will find an /uploads/ folder. Right clicking on the folder will show options to your, where you will find file permissions as one of options available.

On selecting “file permissions,” a whole new dialog box will appear in front of you. In this you have to set file permissions for uploads directory. Well, to perform this task, enter 744 in the numberic value box and once done, you need to check the box next to Recurse into subdirectories. As soon as you complete the task, click on “Apply to directories only” radio button. Click OK and you are done.

The next step which you have to perform is to set file permissions for all the files in the uploads directory. The step again (almost) follow the same suite as above, simply right click on uploads directory followed by selecting file permissions. In this, at the file permissions dialog box, change the numeric value to 644. Now, once done, check on the box next to Recurse into subdirectories. Click OK and you are done.

How To Get Help With WordPress?

You Can Help

While one can get the answer to their problem on searching WordPress forums and the Codex, a WordPress junkie (like us) can be happier on finding that there are plenty of dedicated WordPress websites (including ours JustWP.org) which can help one out. One can found WordPress help everywhere; all the matter of fact is what you are looking onto and how you are searching onto find your problem.

You can also start your search by looking around in the WordPress FAQs, which contains a huge collection of extensive answers to frequently asked questions. Other option you can opt for by posting your issue in the forums, while sometimes it may require longer time to get it solved as it totally depends on who is looking on your issue and how and what way response you are getting around.

In this article, I tried to detail out all those ways by which you can see your issue resolved. As I mentioned above, there are plenty of ways available out there, which includes looking around the web, finding various tips and tricks, the BEST WordPress websites which contains plenty of information and talk about anything from themes to plugins to tutorials and much more.

#1 Getting Help Using Keywords

There are huge ways by which you can search the web for finding the correct information you will be looking around. But, do you know that if not putting the right combination of keywords or single keyword for your search, you will nothing but end in making a huge mess on wasting your time. It’s better to limit your search to only WordPress resources related websites. Say, for example,


The following contains nothing but set of codes, but in actual if you check the text clearly it contains keywords in it. Specifically if you look pretty clearer, then you will notice that there is the specific errors which are failed to open stream and failed to open required while both happening within the wp-settings.php file. Now, the idea is although it’s nothing but an error, but this error will be your keyword and this is how, failed to open stream and failed opening required. All you have to do now is create a search in your favorite search engine which included the words:

Other thing you also have to keep a note that all the time finding keywords is not an easy task. Sometimes, it may require more efforts then you think upon. To note also here that if the problem you experience in CSS or HTML, you can include the specific tag or selector which has that problem, but in actual your main objective is to search for right words which will describe your actual problem.

#2 Search Terms Brainstorming

As discussed in #1 above, there are one-to-many chances that you caught up with finding out the right keywords. For that, you can try to brainstorm your keywords by first writing down the problem. Make sure here that you write your problem in a descriptive manner. Say, for example, the text we have taken from JustWP.org’s sister blog I2Mag:

Samsung today released a press invite to its Samsung Unpacked event which is going to take place at IFA 2013 on September 4th.

If you look onto the statement properly, you will notice that there are number of keywords are there – Samsung, Press Invite, Samsung Unpacked Event, IFA 2013, IFA – all you have to do is to arrange them properly in order to build your keyword list, which can help you out in finding the right solution for your problem.

#3 Using Search Engines

Google Site Search

To search a specific website, say JustWP.org in the Google search window, type your keywords with the site: reference at the end.

Google in this case will search all JustWP.org website and give the desired results back to you.

To narrow down your search to a specific site, say www.justwp.org, use the site: reference and type:

Google will search only the www.justwp.org site, which includes the search in all the pages and posts.

Yahoo Site Search

If you want to search a domain or website in Yahoo, then you can use Yahoo’s Advanced Search Page which allows you searching by domain name straightaway.

Other Search Engines

Try to check other search engines with their Advanced Search Options, for which, the details you can find at one place at the Search Engine Watch’s Search Command list.

#4 More Options

Over the top, if nothing above helps you out, we are always available for you, just buzz us up by filing up the contact form.

Photo Credit: Flickr/TMAB2003

WordPress Common Issues Part – 2

Note: Earlier, I discussed about what the WordPress common issues are and how to solve them – in case if you missed out that part, then you can check the article here. Hope, this tutorial – the second in the series – will also result out to be useful for you. Make sure to write onto the comments below sharing how you feel and think that the content makes sense for your daily WordPress chores (which often happens more than once in a day sometimes). Happy Reading!

Stop

You finished writing your great post – your great next post – or added new or deleted old categories or maybe you added a plugin or two. But, what exactly happened, you don’t know as nothing has changed in front of you. Whatever the changes you did, everything still remains the same. You even be wondering that the fixes isn’t got fixed. The condition makes your surprised, panicked, making you screamed out loudly or even shattered for some time, but in real you need not to worry as you don’t have to do nothing like that.

The solution here first before going or digging even a percentage technical inside, calm down first as only then you and me, we can proceed and understand that what actually has happened with you in the last few minutes. Recalling everything for a second or OK if you want time more, think for a minute that what all had happened. The problem in front of you might be because with WordPress, the database, server or something that you did jumbled up. But, wait as you will definitely get your smile back when I tell you that the culprit is your internet browser. Surprised!!! Well let’s now find the potential problem and sole the issue one by one.

Potential Problem #1 – The Browser Cache

The time from when computer was first born and the time when you and me – we both are using it – a lot of tech advancements come in between – and result of which the well known – our day-to-day used gadget (device or gizmo or whatever you like to call it upon) has made our lives much easier. You did notice that when you visit a website for the first time, it takes time and when the next time you open the same site; it opens in friction of seconds. It’s all because of the browser cache which meant to speed up internet browsing for you. The cache stores the web files and information so that the browser can reuse it when the page is refreshed or viewed again.

How To Clear The Browser Cache?

In some cases by just clicking on the Refresh button on the browser toolbar or press the F5 key will let you solve your problem. But, if this doesn’t work for you, then following the steps below will let you clean the browser’s cache so that the changes you did will comes visible to you once you reload the page.

Microsoft Internet Explorer

  • Hold down SHIFT and click on the REFRESH button in the toolbar under the menu.
  • If in case you are having problems clearing out the cache, then you have to force it by choosing from the menu: TOOLS > INTERNET OPTIONS > TEMPORARY FILES and click on Delete Temporary Files.
  • You can choose the checkbox to delete all Internet files as well as clear all your passwords and cookies (if you wish). But if the problem still stands still, then go all the way.

Mozilla Firefox

  • Hold down CTRL+SHIFT+R.
  • If in case you are having problems clearing out the cache, then you have to force it by choosing from the menu: Tools > Options > Privacy > Cache and select Clear.
  • If in case you are using Chris Pederick’s Web Developer Extension, click Miscellaneous and then Clear Cache.

Google Chrome

  • Click the Chrome menu Chrome menu on the browser toolbar.
  • Select Tools and then select Clear browsing data.
  • In the dialog that appears, select the checkboxes for the types of information that you want to remove.
  • Select from clearing everything or for some specific duration you want to delete. If problem still remains, then advisable to delete everything.
  • Click Clear browsing data and you are done.

Potential Problem #2 – A WordPress Cache Plugin

To speed up your WordPress blog, you might add cache functionality in lieu of helping you to have your blog load faster. The idea is good to use the plugin – WP Super Cache or W3 Total Cache – as it retrieves the pages of your blog from the cache instead of generating them again and again. But, do you know that if you make any unnecessary changes in the plugin, then these good-called cache plugins will not cleared the old version and keep on showing you that only. It’s always advisable to check the plugin’s instructions well before to find out how to clear its cache.

Suggested Reading: WP Super Cache Vs W3 Total Cache – Which One You Choose?

Potential Problem #3 – Server-side Caching

This third potential problem sustains for some, especially when you are among those who are using a webpage cache plugin called as Varnish on your web server which will result in not displaying the recent files in front of you. Keep remember this that if you want all your edits to appear the same time in front of you, you should either disable caching or configure in such a way that it doesn’t cache the files you are working with.

Also, note that some web hosting services may use cache plugins on the backend for which you probably not having the correct knowledge of it. But, again you can turn it off by visiting your webhost’s configuration panel. If in case, you yourself feel that you are not capable (technically wise) enough to turn it off, then it’s better to ask a support member for your webhost to do the same for you.

Photo Credit: Flickr/purpleapple428

Powered by WordPress & Theme by Anders Norén