WordPress Themes, Plugins, Tutorials, Tips And More...

Tag: Post Page 1 of 2

Best WordPress Post Rating Plugins

WordPress

Here in this article, we have showcased the best available posts rating plugins which you can considerably use for your WordPress website.

kk Star Ratings

The plugin allows blog visitors to involve and interact more effectively with your website by rating posts. The plugin will display a user defined amount of star ratings in your posts/pages. It supports Google Rich Snippets with the ratings will get indexed in Google search.

More Info | Download

Polldaddy Polls & Ratings

The plugin allows you to create and manage polls and ratings from within your WordPress dashboard by letting you create polls with an option to choose from 20 different styles for your polls, and view all results for your polls as they come in.

More Info | Download

GD Star Rating

The plugin allows you to set up advanced rating and review system for post types and comments in your blog using single, multi and thumbs ratings.

More Info | Download

Review Ratings

The plugin allows you to easily insert star ratings for your movie or book reviews.

More Info | Download

Comment Rating Field Plugin

The plugin will add a 5-star rating field to the end of a comment form in WordPress, allowing the site visitor to optionally submit a rating along with their comment.

More Info | Download

Rate This Page Plugin

The plugin allows registered user and visitor to rate an article posts or pages. Using cookies, the plugin stores a session if a guest user rates certain posts or pages and it uses AJAX to store the rating information.

More Info | Download

Rating-Widget

The plugin allows you to create and manage ratings from within your WordPress dashboard. You can embed thumb and star ratings into your posts, pages or comments. You can also avail of the ‘Top Rated’ widget that will allow you to place the widget in your sidebar and will show you the top rated posts, pages and comments.

More Info | Download

EC Stars Rating

A lightweigt, blazing fast star optimized for SEO and with a really low impact on page load rating plugin for WordPress.

More Info | Download

Want To Add Google Fonts In WordPress Post Editor, Try Supreme Google Webfonts Plugin

Love for Google is something that will be a never ending process so as that of the fonts Google offered. In the same way, fonts play an important role in your WordPress blog while if in case you didn’t know about Google Fonts, then you will get a smile over learning that Google has a library of about 300 webfonts which you can use on your WordPress site or blog. These fonts will load quickly as they are hosted on Google’s servers while with having an open source nature; you are completely free to use them the way you want to. In this article, we are going to share about a plugin name Supreme Google webfonts by which you can easily add these Google fonts in your WordPress post editor.

Plugin To Use: Supreme Google Webfonts

Google Fonts

The plugin will add all 291 Google webfonts into your visual editor panel when creating posts or pages. As soon as you installed and activated the plugin, you will notice an extra column at the top with a drop down list for choosing fonts to your post editor while if you are using a WordPress multisite, the plugin can be get added on all of your blogs.

More Info | Download

Allowing Authors To Revise Published Posts

There is no doubt that WordPress is a powerful blogging platform but thanks to its regular installation it doesn’t come fully equipped the way it has to be for multi-author blogs. If you are running a multi-author blog, then it is highly required to increase the workflow for authors giving them an extra mile of efficiency.

To letting this happen, you need to install and activate the plugin name Revisionary. Once it got activated, a whole new menu option will get added under Settings >> Revisionary. Although the default settings will work as a complete tool for lots of blogs, but still if your require something more, it would be best to review the settings and see if you need to add or change something.

Revisionary

Once you are done with installation, you will see that the plugin will create a new user role, called Revisor. Now, here you get a choice on to assign this role to an existing user or create a new user with the Revisor role. The Revisor role user can edit posts as revision and on completion they can submit it for review.

Plugin In Use: Revisionary

The plugin enables qualifies users to submit changes to currently published posts or pages. It will give ability to the contributors to submit revisions to their own published content. If these changes approved by Editor, it can be published the very same time or can be scheduled for future publication.

Feature:

  • Pending Revisions allow designated users to suggest changes to a currently published post/page
  • Scheduled Revisions allow you to specify future changes to published content (either via Pending Revision approval or directly by fully qualified author/editor)
  • Enchanced Revision Management Form
  • Front-end preview display of Pending / Scheduled Revisions with “Publish Now” link
  • New WordPress role, “Revisor” is a moderated Editor
  • Works with blog-wide WordPress Roles, or in conjunction with Press Permit or Role Scoper

More Info | Download

Best Post Rating Plugins For Your WordPress Blog

Want to rate posts in your WordPress blog so as to get feedback from your readers. The idea do sounds good at first, but selecting the right plugin which fulfils all your requirements of adding such post rating plugin will sometimes make your mind choosy. The reason is simple as there are numerous options available from which you can choose upon. It’s not one, two or says three plugins available out there, but there are hundreds in actual – some are free and some are premium. In this article, we will be going to discuss best (free) post ratings plugins which you can use in your WordPress blog.

Rating

Rating-Widget

The plugin allows you to create and manage ratings from within your WordPress dashboard. You can embed thumb and star ratings into your posts, pages or comments. You can also avail of the ‘Top Rated’ widget that will allow you to place the widget in your sidebar and will show you the top rated posts, pages and comments.

More Info | Download

kk Star Ratings

The plugin allows blog visitors to involve and interact more effectively with your website by rating posts. The plugin will display a user defined amount of star ratings in your posts/pages. It supports Google Rich Snippets with the ratings will get indexed in Google search.

More Info | Download

Polldaddy Polls & Ratings

The plugin allows you to create and manage polls and ratings from within your WordPress dashboard by letting you create polls with an option to choose from 20 different styles for your polls, and view all results for your polls as they come in.

More Info | Download

Comment Rating Field Plugin

The plugin will add a 5-star rating field to the end of a comment form in WordPress, allowing the site visitor to optionally submit a rating along with their comment.

More Info | Download

Rate This Page Plugin

The plugin allows registered user and visitor to rate an article posts or pages. Using cookies, the plugin stores a session if a guest user rates certain posts or pages and it uses AJAX to store the rating information.

More Info | Download

EC Stars Rating

A lightweigt, blazing fast star optimized for SEO and with a really low impact on page load rating plugin for WordPress.

More InfoDownload

GD Star Rating

The plugin allows you to set up advanced rating and review system for post types and comments in your blog using single, multi and thumbs ratings.

More Info | Download

Review Ratings

The plugin allows you to easily insert star ratings for your movie or book reviews.

More Info | Download

Photo Credit: Flickr/Ben+Sam

How To Divide Your WordPress Posts Into Multiple Pages

Pages

It’s been a quite longer time that we are getting regular inquiries over the question that how one can divide the big, long WordPress posts into multiple pages. So, today to help all you guys, I came up at the point, where I felt that let’s do it. In this article, I will show you how simply and without the use of any plugin you can achieve your aim of dividing your WordPress posts into multiple pages.

Step 1: <!––nextpage––> tag

It is as simple as one can think of. In most of the perfectly coded themes, all you have to do is copy the code <!––nextpage––> and paste it in the place where you want the next page to start. Don’t worry for pagination as it will automatically show up. Also, for a quick note here that you put up the code in the Text view and not in Visual view in your post editor.

Step 2: If Step 1 Doesn’t Works

If in case, the step 1 does not work for you, then just copy and paste the following code in your theme’s single.php file:

<?php wp_link_pages(); ?>

Once you added this, the pagination will start to show up while you can add as many as parameters to it, totally as per your requirement.

Photo Credit: Flickr/Hellmy

Best Plugins For Your WordPress Posts

Plugins

As a blogger, the first thing which plays an important role for us is how our post area is presented i.e. what it includes and what it don’t. Does it contain social media buttons, do it contains comment box and so on. With similar context, here in this article, I will be sharing the best plugins which you definitely like or even love to use for your WordPress posts.

CP Contact Form with PayPal

With CP Contact Form with PayPal you can insert a contact form into a WordPress website and connect it to a PayPal payment.

More Info | Download

Zedity

The plugin is for anyone to create content with unprecedented possibilities, very quickly and easily like never before!

More Info | Download

Share Buttons by E-MAILiT

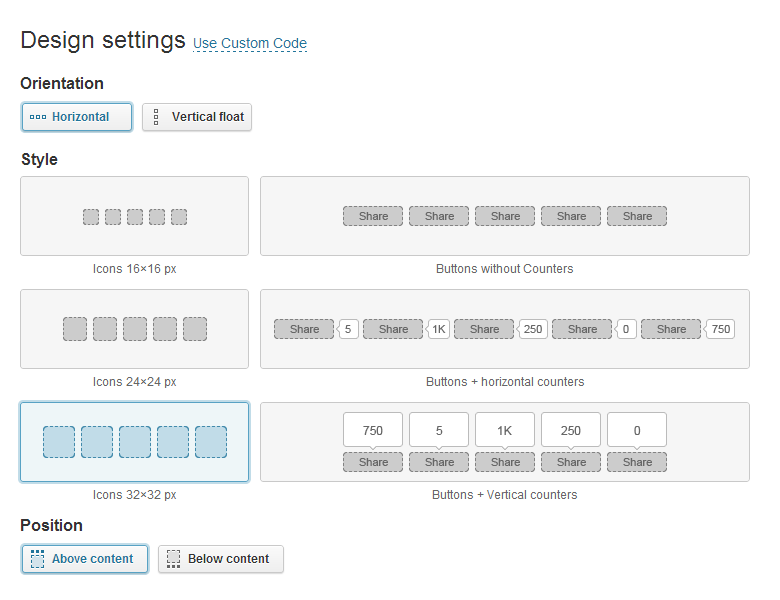
The plugin make easier to increase your content distribution, generate revenue & measure social analytics for free.

More Info | Download

Easy Media Gallery

The plugin is the best gallery plugin for wordpress designed to display various media.

More Info | Download

AtContent

The plugin lets you grow your audience and traffic with just a few clicks. Easily repost content via relevant blogs, across all blogging platforms!

More Info | Download

Video Gallery

The plugin was created and specifically designed to show your video files in unusual splendid ways.

More Info | Download

Unique Headers

The plugin adds the ability to use unique custom header images on individual pages, posts or categories or tags.

More Info | Download

Users Ultra

The plugin is the ideal tool for creating advanced user communities in few minute.

More Info | Download

Live Chat by Flyzoo

The plugin is the perfect live chat for your community or shop!

More Info | Download

Calculated Fields Form

With Calculated Fields Form you can create forms with dynamically calculated fields to display the calculated values.

More Info | Download

Catch IDs

The plugin is a simple and light weight plugin to show the Post ID, Page ID, Media ID, Links ID, Category ID, Tag ID and User ID in the Admin Section Table.

More Info | Download

Slider

The plugin is a quick and easy way to add custom sliders to the WordPress websites (both to templates and posts/pages). The slider allows having unlimited amount of images with their titles and descriptions.

More Info | Download

How To Create A Separate Page For Blog Posts

wordpress-logo

WordPress, by default, show your content in a blog format on the homepage. But do you know, if you wish, you can change that and can create a custom homepage as per your requirements. In this article, I will show you on how you can create a seperate page for blog posts.

#1 Getting Started

As I mentioned above, WordPress includes a pre-built support for creating static front page (home page) as well as seperate pages for blog posts. But, if you want to use this method, you have to first create two new pages in your WordPress blog. In order to start, go to Pages and select Add New option as with that only you will be able to create new page. Titling the page as “Homepage.”

Once you titled the page, you will notice that in the right hand side, there is an Attributes box which comes with an option to choose a template. An important thing to note here is that most of the themes in today’s time comes with pre-set template. Once you choose the template, click on checking the discussion box which you will find on screen options at the top right corner of the screen.

Choosing the discussion box will let you showcase the discussion meta box below the post edit area. Make sure here that you will uncheck both comments and trackbacks as doing this only will leads to disabling discussion on the homepage.

#2 Second Step

Now, once you completed the above steps, it is the time to create second page for your blog posts. This time, let’s name the page as “Blog Page.” For this, considering on choosing the default template as an option while you might possibly noticed more template options (as it depends totally on the theme you are choosing). Here also, don’t forget on to disable the comments and trackbacks option.

#3 The Finale

Since, now we created the two pages, it’s time to use these pages as the way we want. Go to Settings >> Reading and under the Front page displays option, you have to choose A static page as an option. Save your changes and load your website to see the reviews you performed.

Recommended Reading

How to Start a Blog: The Beginner’s Guide to Successful Blogging – The guide is an introduction to mastering the art of blogging. It provides easy to follow steps to start, maintain, and grow your blog. [Explore Today]

Reviewed – Contextual Related Posts

How you connect a reader with similar category posts in your WordPress site? Or how you let your readers know that there are plenty of posts you and/or your team written down which comes under same category. The answer is you are in the need of one such plugin which let you display a list of related posts both on your website and in feed.

Image-1

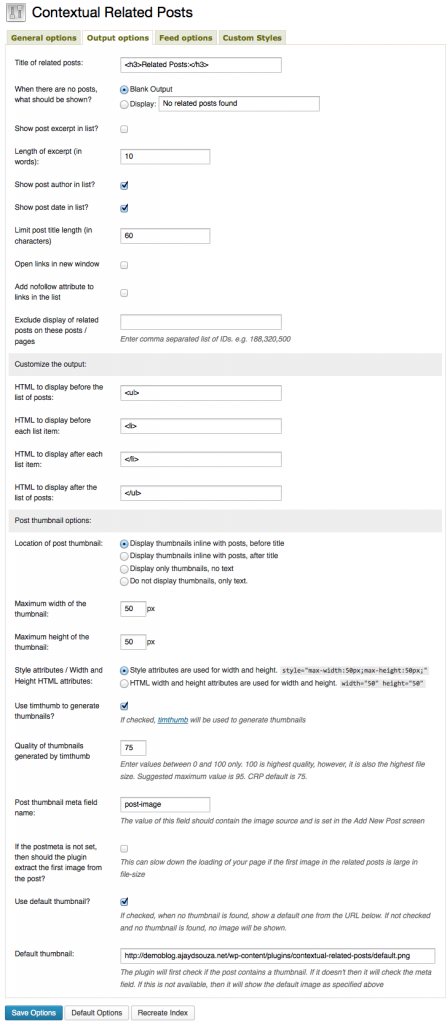
Contextual Related Posts is one such plugin which help you achieve the aim as it will let you display related posts on your WordPress blog and feed. Moreover, it also supports thumbnails, shortcodes, widgets and custom post types while the list is based on the content of the title and/or content of the posts while helps you retain interest of your readers, reduce bounce rates and refresh old entries.

Image-2

Features

  • Automatic: CRP will start displaying related posts on your site and feed automatically after the content when you activate the plugin. No need to edit template files
  • Manual install: Want more control over placement? Check the FAQ on which functions are available for manual install.
  • Widgets: Add related posts to widgetized area of your theme. Lots of options available
  • Shortcode: Use [crp] to display the posts anywhere you want in the post content
  • The algorithm: Find related posts by title and/or content of the current post
  • Caching: Related posts output is automatically cached as visitors browse through your site
  • Exclusions: Exclude posts from categories from being displayed in the list. Or you can exclude posts or pages by ID
  • Custom post types: The related posts list lets you include posts, pages, attachments or any other custom post type!
  • Thumbnail support
  • Styles: The output is wrapped in CSS classes which allow you to easily style the list. You can enter your custom CSS styles from within WordPress Admin area
  • Customisable output

Installation, Download & Configuration

Image-3

WordPress install

  • Navigate to Plugins within your WordPress Admin Area
  • Click “Add new” and in the search box enter “Contextual Related Posts” and select “Keyword” from the dropdown
  • Find the plugin in the list (usually the first result) and click “Install Now”

Image-4

Manual install

  • Download the plugin
  • Extract the contents of contextual-related-posts.zip to wp-content/plugins/ folder. You should get a folder called contextual-related-posts.
  • Activate the Plugin in WP-Admin.
  • Goto Settings » Related Posts to configure
  • Optionally visit the Custom Styles tab to add any custom CSS styles. These are added to wp_head on the pages where the posts are displayed

Image-5

Summary & Review

On using it for the first time, you will get the mixed feelings that whether I am using the right system or not, but sooner or later, you felt that yes I made a right choice. And this is all because that while the plugin lets you display related posts both on your blog and feed, it also supports thumbnails, shortcodes, widgets and custom post types. In short, you are getting all the things at one place. I will say and suggest you to give a try, it’s worth a shot.

Note:

1. Is your product the Next Big Thing? Wanna have the whole of world heard what you are coming up with via our website? We have two options for you to submit your WordPress-related product or service to be reviewed on JustWP.

More Info | Free Submission | Speedy Submission

2. Like the post, then make sure you do follow and like us on both Twitter and Facebook.

Adding WordPress Widgets In Post And Page

There comes a condition in front of you many times when you wish that your favorite sidebar will get added to your post and page content. But the confusion over on this exactly will be the best bet to perform.

amr shortcode any widget

Starting with you need to install a plugin name amr shortcode any widget first and once activated go to Appearance >> Widgets. Once completing this task, now drag and drop the widgets you want to display in your post or page into the Shortcodes sidebar, followed by adding the shortcode [do_widget id=widgetid] in a page or post.

Plugin in use: amr shortcode any widget

The amr shortcode any widget is a simply “utility” plugin which allows you to have any widget used in a page shortcode in any theme.

Steps To Follow:

  1. Test chosen widget works in normal sidebar first.
  2. Activate this plugin
  3. Go to Appearance > widgets and find “shortcode” sidebar
  4. Drag chosen widgets from configured sidebar to shortcodes sidebar. Save.
  5. Go to page where you want configured widget to appear
  6. enter one of: [do_widget widgetname] eg: [do_widget calendar] [do_widget “widget name”]. eg: [do_widget “tag cloud”] [do_widget id=widgetid] in a page or post
  7. If the plugin cannot work out what you want, it will show a debug prompt , click on the debug prompt and look for the id of your widget in the shortcodes sidebar. Try with the id.

More Info | Download

Page 1 of 2

Powered by WordPress & Theme by Anders Norén