WordPress Themes, Plugins, Tutorials, Tips And More...

Tag: WordPress Blog Page 1 of 3

Best CSS Plugins For Your WordPress Blog

Stylesheet

Known as a style sheet language, Cascading Style Sheets (CSS) is used for describing the presentation semantics of a document written in a markup language. It is the most common application one use to style web pages written in HTML and XHTML. Wondering on how the CSS will make an impact on your WordPress blog, I have collected the best available CSS plugins for you. Hope this list helps you grabbing more.

Styles

The plugin gives you creative control in one consistent interface – the WordPress theme customizer.

More Info | Download

Standout Color Boxes and Buttons

The plugin implements colored content boxes and buttons as described in a Studiopress blog post.

More Info | Download

Async JS and CSS

The plugin converts render-blocking CSS and JS files into NON-render-blocking, improving performance of web page.

More Info | Download

Ultimate TinyMCE

The plugin beefed up the WordPress TinyMCE content editor with a plethora of advanced options.

More Info | Download

Site Layout Customizer

The plugin customize the front page & other pages. Display your posts with different layouts.

More Info | Download

WP font-face

CSS @font-face font replacement for WordPress

More Info | Download

CSS & JavaScript Toolbox

The plugin easily add custom CSS, JavaScript, HTML and PHP code to unique CJT code blocks and assign them wherever you want.

More Info | Download

WP Live CSS Editor

The plugin edit, preview changes in real time and save all your project’s CSS stylesheets live in the browser.

More Info | Download

Browser Specific CSS

The plugin allows you to easily target specific browsers and operating systems from your theme’s style sheet using regular CS.

More Info | Download

Simple Custom CSS

The plugin add custom CSS to your WordPress site without any hassles.

More Info | Download

MnCombine

The plugin easily manage the merging and compression of js and css files from plugins and themes.

More Info | Download

Widget CSS Classes

The plugin add custom classes and ids plus first, last, even, odd, and numbered classes to your widgets.

More Info | Download

Mobile CSS

The plugin allows you to define different CSS styles that get loaded for specific mobile devices.

More Info | Download

Photo Credit: Flickr/Kai Chan Vong

Adding Google Search In Your WordPress Blog

When it comes to search, WordPress drastically lacked the space although there are plugins available out there which may helps the one to improve search results. But for those who don’t want to add additional plugin for the purpose as well as increase the functionality, there is one such big option available out there. One can consider on replacing their by default WordPress search with Google custom search.

Google Search

Suggested Reading: Five Best Search Plugins For WordPress

Creating a Google Custom Search Engine

  1. Go to Google Custom Search Engine and sign in using a Google account.
  2. Once in, then click on New Search Engine and add your WordPress website’s URL.
  3. Click on Create button to proceed to the next step.
  4. Once done, you will notice a notification which says you have successfully created your custom search engine.
  5. An option then will comes in front of you either to add it to your site or get the public URL.
  6. To add this to your WordPress site, click on the Get Code button.

Adding In Your WordPress Blog

  1. Go to Appearance » Editor in your WordPress admin area and click on searchform.php file.
  2. The searchform.php file will open it in the editor.
  3. Paste the custom search engine code in the file.
  4. If your theme does not have a searchform.php file, then you need to create one using a text editor like Notepad.
  5. Once created, upload it to your theme directory using FTP client.
  6. Once code is pasted at its right place, go to Appearance » Widgets to drag and drop the search widget into your sidebar.

Photo Credit: Flickr/karlnorling

Getting Word Count Stats With Word Stats Plugin

Well with time, when you single post turned into large number of posts in few months period and you will now get tangled with lots of stuff in your website. You wondered on finding out what are the different stats the site bringing in. The stats will be anything says total posts, total comments and so on. Just with same contextual, a reader of ours ask what we can do in order to get the total word count stats in WordPress, so that one can see word counts.

Word Stats

In this article, we are going to discuss about the plugin name Word Stats which will help you achieving the same. To start with you need to install and activate the plugin first. Once activated, you will see Word Stats link in your Dashboard area while clicking on it will take you to the word count stats page.

The plugin will bring you the stats showing total number of published word counts for different post types as well as different authors on board. Moreover, it allows you to search the word counts via using filters like keywords or from a specified time period and so on. The plugin will also let you show the word count to your users.

Plugin In Use: Word Stats Plugin

Word Stats adds a suite of linguistic diagnostics to help you keep track of your content and improve its quality. The reports page lets you select an author and period to analyze, and displays:

  • The total word count.
  • The number and percentage of posts of each post type.
  • The top 20 keywords.
  • The percentage of posts of basic, intermediate and advanced readability level.
  • A graph with monthly word counts for each post type.
  • Diagnostics tables, with links to edit the posts that may be too short, too long, too difficult, too simple, lack relevant keywords or abuse certain keywords.

More Info | Download

Creating A Table Of Content In WordPress

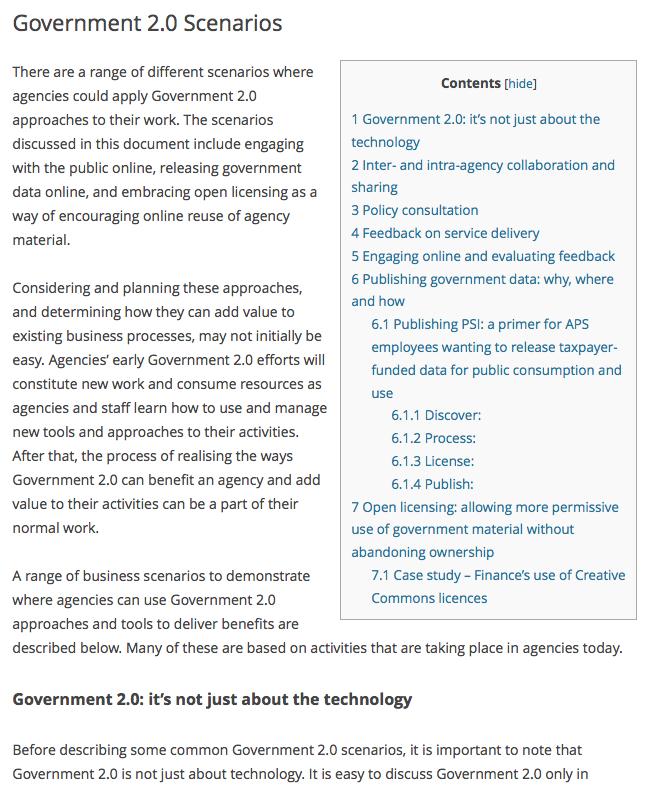
While we covered earlier about a plugin name Table of Content Plus pluginin a review article BUT still some of visitors get confused over on what context one can use the plugin or one can create a table of content in WordPress for either posts or pages.

Table Of Content Plus

Understanding Why It Is Necessary?

Adding table of content to your WordPress website will helps with search engine optimization as Google automatically adds a jump over to section links at the time when the site showed up in search results.

Why To Choose Plugin?

The process of creating a table of content can be done manually BUT it can be difficult for many WordPress beginners. Considering the situation, in this article, we have been showing you on how to achieve this.

Steps To Follow

  • You need to install and activate the plugin name Table of Content Plus.
  • On activation, you need to configure plugin settings. Simply click on Settings » TOC+ in your WordPress admin area.
  • You can select where and when you want your table of contents to appear in the main options tab while the plugin comes with default position set as “before the first heading”.
  • The second thing to keep an eye on is to decide on where the table of content will appear. By default, the plugin will display table of contents if a post or page having over four heading tags while if you wish, you can change it to the number of your choice.
  • There is also an option name ‘Auto insert for the following content types’ which on checking will enable table of contents for your posts as well automatically.

More Info | Download | Review

Getting The Complete phpinfo() In WordPress

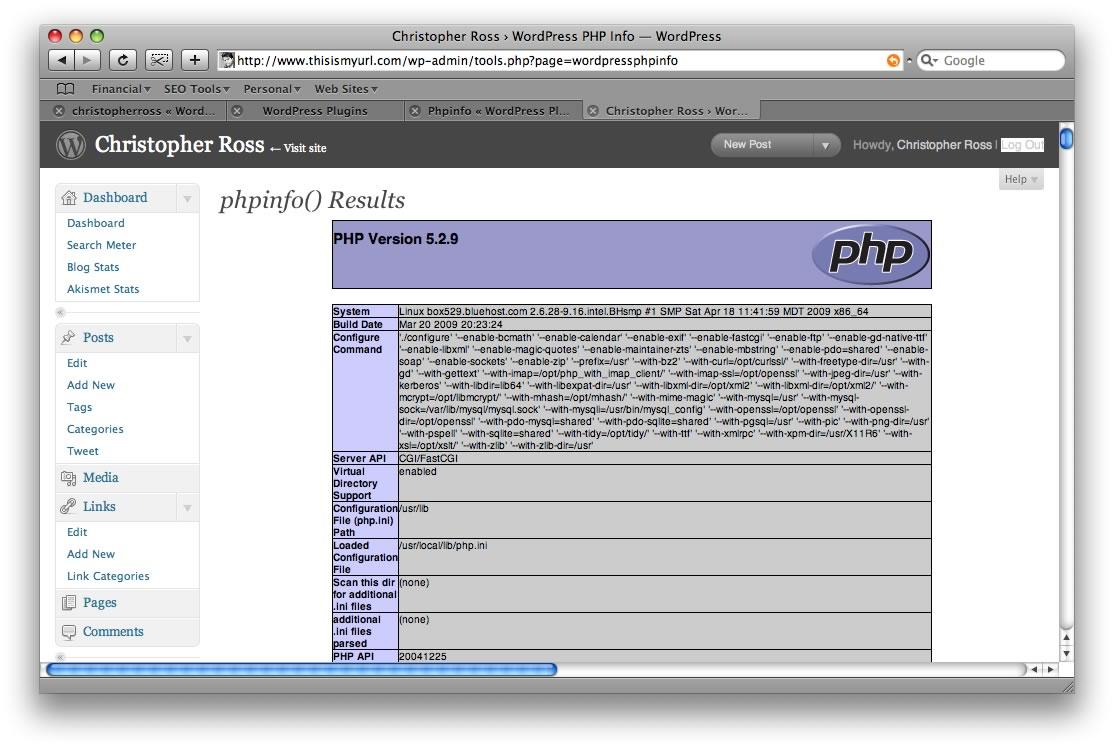
It is quite a time when asking for support; the developers might require some additional PHP information. The information includes like system information, build date, configure command, server API, virtual directory support, configuration file, and loaded configuration file among others.

Well to get all these information, you need not to dig deeper BUT with the use of the plugin name phpinfo(), you will get all these information with an ease. The information will be displayed under your dashboard’s Tools >> phpinfo().

Plugin To Use: WordPress phpinfo()

WordPress PHPInfo()

Key Features:

  • It’s important for a non technical administrator to be able to diagnose server related problems in WordPress.
  • But also rapidly retrieve feedback regarding their web server.
  • The plugin adds an option to an administrator’s Tools menu which displays standard phpinfo() feedback details to the user.
  • It is a very simple script, designed to help the non technical user get immediate feedback about their blog.

More Info | Download

Showing ‘Selected’ Tweets Only In WordPress

Twitter

Social media in recent years took a huge leap from nothing to somebody to our one of the best friends. Among the entire social networking site, the one which got a huge love is nothing but a micro-blogging site: Twitter. People love it more as when compared to any other social network. You can found almost every second or third site using Twitter as one if social sharing medium either in form of Twitter Follow Button, Twitter Widget or more. Counting over on this, we think of what it will look like if one wants to show only “selected” tweets in their WordPress blog.

Suggested Reading: Best Twitter Plugins For Your WordPress Blog

Steps To Follow:

  1. Considering that you wish to add Twitter widget to your WordPress site with showing tweets containing certain keyword or hashtag.
  2. Go to Twitter Widgets site and click on the search tab.
  3. In the search query box enter from:justwp #WordPress. (Replace justwp with your own Twitter handle and #WordPress with your own selected keyword or hashtag)
  4. Save your widget and copy the widget code.
  5. Now on your WordPress site, go to Appearance » Widgets.
  6. Drag and drop a text widget to your sidebar and paste widget code inside it.
  7. Save your text widget and preview your website.
  8. Doing this and you are done.

Photo Credit: Flickr/Garrett Heath

How To Show Weather Forecast In Your WordPress Blog

While it does interest a lot of people over the web on and while developing WordPress blog on how to show up a weather forecast data. And luckily in order to do so, you don’t have to go much in depth and phase out things as rocket science. In this article, we will share the plugins which will help you to show weather forecast in your WordPress blog.

Plugin 1: Weather and Weather Forecast Widget

Plugin-1

A multi-language plugin with shortcode functionality will show you current weather and forecasts for the next nine days of any of your chosen location.

Features

  • Present the weather in your sidebar or by shortcode anywhere on your site
  • Weather available for nearly any location in the world
  • Weather texts in Arabic, Chinese, Danish, Dutch, English, French, German, Hungarian, Irish, Italian, Norwegian, Polish, Portuguese, Russian, Serbian and Spanish
  • Customizable Layout (Font and Font size / Images and Image size / Amount of Info) incl. optional smooth theme integration by embedded CSS
  • Current Weather
  • Day Forecast
  • Three Day Forecast
  • Further four day forecast (depends on data provider)
  • Working with two data providers optimizes and enriches weather data
  • Detailed information of current weather and forecasts on mouse over
  • Optional Sun- and Moon Info text
  • Supports Imperial and Metric units

More Info | Download

Plugin 2: Animated weather widget by weatherfor.us

Plugin-2

The plugin will show user users weather updates for their location on your website. You can get forecast, various units and eye pleasing weather status which will instantly seeks attention of your visitors. You can add the widget either in your site’s footer or you can put the mini preview version of weather widget in your sidebars.

Features

  • Present the weather in your sidebar anywhere on your site
  • Weather available for nearly any location in the world
  • Cool and familiar style
  • Current Weather
  • Hourly 7 Day Forecast
  • Detailed information of current weather
  • Ultra snappy to load from our ultra fast CDN

More Info | Download

Adding Multi-Column Content In Your WordPress Blog

Advanced WP Columns

It is pretty much common that you will be interested in adding multi-column content in your WordPress blog. The end purpose can be anything you wish of BUT the decision of adding multi-column will leads toward better prospect in creating a clear post. In this article, we will be going to discuss on how one can add multi-column content layout.

Steps To Follow

  • You need to install and activate the plugin name Advanced WP Columns plugins.
  • On activation, go to a post or page edit screen in your WordPress dashboard where you will notice a new button name “Advanced WP Columns” in the visual editor.
  • On clicking, it will allow you to easily create column layouts.
  • You get an option on to choose anything from pre-set two, three or four column layouts.
  • On selection, now all you have to do is to drag the Add button to the columns bar to create a new column while if you want to delete a column, simply drag and drop the Remove button to the column you want to remove.

Plugin To Use: Advanced WP Columns

Advanced WP Columns plugin provides you to set up your blog content in the multiple columns using simple user interface, without any short codes.

More Info | Download

How To Add Facebook Follow Button In Your WordPress Blog

Facebook

The day Facebook comes into existence, it took the whole of web-o-sphere into social storm. There are one-to-many ways available by which one considers on sharing and following things through Facebook. But what will be case, if you want to add Facebook follow button in your WordPress blog. Yes, you heard it correct, with some simple steps, you too consider on adding follow button in your WordPress blog.

Steps To Follow

#1 For Single Author WordPress Blog

  • To start with, simply add a Facebook follow button with the help of the code via Facebook Social Plugins website.
  • This code can then be pasted to your WordPress theme page, widget or template, wherever you want.
  • Once you are in the Facebook Social Plugins website, you will be asked to provide Facebook profile URL of the user, and Facebook automatically generates the follow button preview for that.
  • Further, it offers you to choose a layout as well as ask you to configure the appearance of the plugin, which you can get it by clicking on the Get code button.
  • Once you have the code in front of you, simply copy it and make it paste where you want to display Facebook follow button in your WordPress blog.

#2 For Multiple Authors WordPress Blog

  • Simply install and activate Facebook plugin which once upon activated will add to a Facebook menu item in your WordPress admin sidebar.
  • Clicking on it means you will be requiring application key and secret key. For this, now go to Facebook Developers website by logging in with your Facebook account.
  • Once you are in Facebook Developers website, click on Create New App button followed by which a small pop up would appear, which will ask you to provide your app name.
  • Once done, you will enter into a developer page of your app where you will see your App ID and App Secret Key, the one which you require at first step (above).
  • Simply copy those keys and make them paste into your Facebook plugin’s page on your WordPress website.

The Final Step: Adding The Facebook Follow Button

  • Now to add the Facebook follow button, simply go to Facebook» Follow Button menu option. In this an option comes in front of you that will say where you want your follow button to appear i.e. posts, page, archives etc as well as you want it before or after posts or both.
  • Further you can also choose the color scheme as well as content width and so on, totally as per you choice. Once you are done with selection, simply save the changes.
  • Once you are done with setup, simply connect Facebook account with the WordPress blog.
  • If you are running a single author website, then go to Facebook » Social Publisher and click on the link Associate your WordPress account with a Facebook account while if you are running a multi author website, then your WordPress blog can connect other author accounts from Users » Profile page with which they can connect their account.

Page 1 of 3

Powered by WordPress & Theme by Anders Norén